Okay, this is a very simple project and my first tutorial so no laughing please. Now why on earth would I want to make a walnut shell, you ask? Er, good question. But off the top of my head I can think of a few ideas:
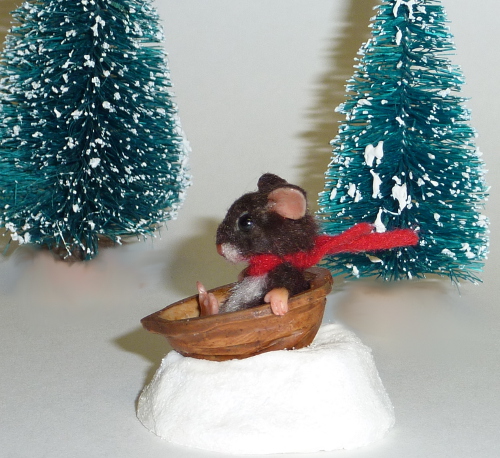
If you make or collect mice, there are a million uses for walnut shells. For example, a bath tub, a bed, a sled, a crib (as shown below).


And for you Fairy lovers out there, same thing. In addition to accessories for your wee ones, you could make Christmas ornaments or even a little box by making two halves.
Anyway, since people have asked, here is the tutorial I've promised.
Okay, here goes:
STEP 1: MAKE A FORMER
You'll need some kind of "former" - something to form the shell around. If you have something around the house that is the exact size and shape you are looking for, lucky you. If not, it's easy to make your own former. Just get some polymer clay. Doesn't matter what it looks like so if you have a stash of scrap clay like me, now's a good time to use some of it.
To the left is a wooden piece from a craft store, and a hand-made former from scrap clay as an example. If you use clay, you just need to form with your hands a sort of roundish egg shape, and bake it per the manufacturer's instructions.
Once cured in the oven, wrap some parchment paper, wax paper or aluminum foil around it. To keep the paper from coming unwrapped, you can use a little tacky glue to keep it in place. This picture shows the smaller clay former wrapped in parchment and the larger wooden former wrapped in aluminum foil.
STEP 2: PREPARE THE CLAY FOR THE SHELL

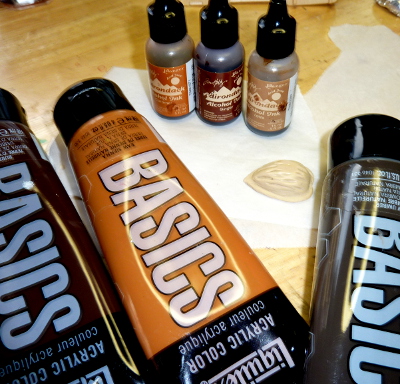
Okay, there are no real rules here. The type of clay and colors you choose are up to you. In fact, I have no idea what colors I've used before so I'm just winging it. This time I chose the following colors: Fimo Desert Sand, Premo Ecru, and Fimo Translucent. Just find some images of walnut shells on the internet as a reference and I'm sure you can come up with the perfect color!
Take whatever colors you choose and condition each separately by warming and softening them up with your hands (mush between your fingers, massage, roll into a ball, etc.), then roll each color into a log shape. Press the logs together and roll this big log between your hands to make one long log.
Fold this log in half and again roll between your hands. Fold in half again and roll, and repeat this process until the log has fine streaks of color.
Like this! (Sorry these pictures are SOOOOOO bad - you can click on each one to enlarge them which may help).
Now squash your log into a roundish ball or blob. If you have a pasta machine for your clay, run it through the machine at the highest setting. If you don't have a pasta machine, you can use a roller or glass bottle to roll it out flat. You want a flat even sheet around 1/8 of an inch thick.
STEP 3: FORMING THE SHELL
Carefully lay your clay sheet over your former, and with your fingers gently press it against the former.
Using a knitting needle, draw an outline of the shell around the former. If you look at a real walnut shell, it sort of looks like an elongated heart shape.
Then take a craft knife and trim off the excess clay.
Use your knitting needle to smooth and shape the edges. Again, give it a bit of a heart shape like this.
Now let's make this sucker look like a walnut shell. Take your knitting needle (you can vary the size of the needle), and make indentations into the clay. Again, it's helpful to refer to images of a real walnut.
You want it to end up looking something like this.
Now it's time to cure it in the oven (again according to the manufacturer's instructions).
If you need to make sure your shell will stand okay on it's own and not "wobble" or fall over on its side, simply flip the shell over and gently press down to give it a slightly flattened bottom before curing it in the oven.
Once cured, let it cool down for a little bit and then remove the former from the shell. It should pop off easily, but if necessary you can use a craft knife to gently slip around the edges to loosen it.
If your shell is a bit lopsided looking like mine, lol, just trim and sand around the edges until you acheive the shape you want.
STEP 4: COLORING YOUR SHELL
Now that your clay shell is cured and cooled, it's time to give it some color. You can use acrylic paint and / or alcohol inks. I use both just for the heck of it.
What I do, is mix up a lighter beige-gray-brown color. I'm going to do a "dry brush" first. You don't want to wet your brush or water down the paint at all. Dip your dry brush in the paint and wipe off the excess onto a paper towel or cloth so that there is very little paint left on the brush.
Brush the paint lightly onto your shell and let dry.
Next, you want to make a darker brown color but this time you want to make the paint very very thin and watery. Brush this darker color over your shell. The thin darker color will run into the groves of the shell. If you need to, you can wipe or lightly dab the excess darker paint off of the shell with a paper towel or cloth and let dry.
I think the alcohol inks work best with this sort thing. So here I'm brushing on some "Latte" colored alcohol ink for its last layer of color.
The ink dries very fast so you need to work quickly. (of course if you screw up, it's easy to remove with some regular rubbing alcohol -not too much though because alcohol will corrode the polymer clay).
Color the inside of the shell basically the same way, but give it a contrasting color to the outer shell (either darker or lighter).
After the paint (and / or ink) has dried thoroughly, apply a light coat of matte varnish as the final step.
Of course the shape, size and color is all up to you.
NOTE: Another option is to go to the store, buy a walnut, eat the walnut, keep the shell. But that's not as much fun in my opinion. :-P


 Okay, there are no real rules here. The type of clay and colors you choose are up to you. In fact, I have no idea what colors I've used before so I'm just winging it. This time I chose the following colors: Fimo Desert Sand, Premo Ecru, and Fimo Translucent. Just find some images of walnut shells on the internet as a reference and I'm sure you can come up with the perfect color!


.jpg)


.jpg)


.JPG)


